Helika Unreal Engine (UE) SDK
Helika UE SDK Docs
The Helika Unreal SDK mirrors the functionalities of the Web and Unity SDK, catering specifically to UE developers. This integration facilitates the seamless inclusion of Helika services into your games. By incorporating the Helika UE SDK, you gain effortless access to the complete range of Helika capabilities, empowering you to construct robust and scalable solutions with ease.
Features
- Streamline integration with Helika services
Current Version: 0.1.1
Installation
You can download the latest version of the Helika Plugin from our github repository.
Add the Plugin to your project directory and enable it from the plugins menu inside the editor. Please follow the quick start guide below as an additional reference.
Quick Start
Pre-requisites
- Helika API Key
- You’ll need a Helika API Key in order to instantiate the plugin.
- Please reach out to your Client Success Manager in order to receive an API key for your organization.
- Event Taxonomy
- We strongly recommend following our suggested Event Taxonomy for game event handling and structure. This is due to how we ingest and store data from your game, in order to make it accessible through our Game Management Platform. By following a standardized format, you will be able to access dashboards and other insights faster within the Helika Portal.
- Please contact your account representative to get support on Event Taxonomy.
Initial Setup
-
Step 1: Download the
sources.zipfile-
Navigate to the Helika UE SDK repo and download the sources.zip file
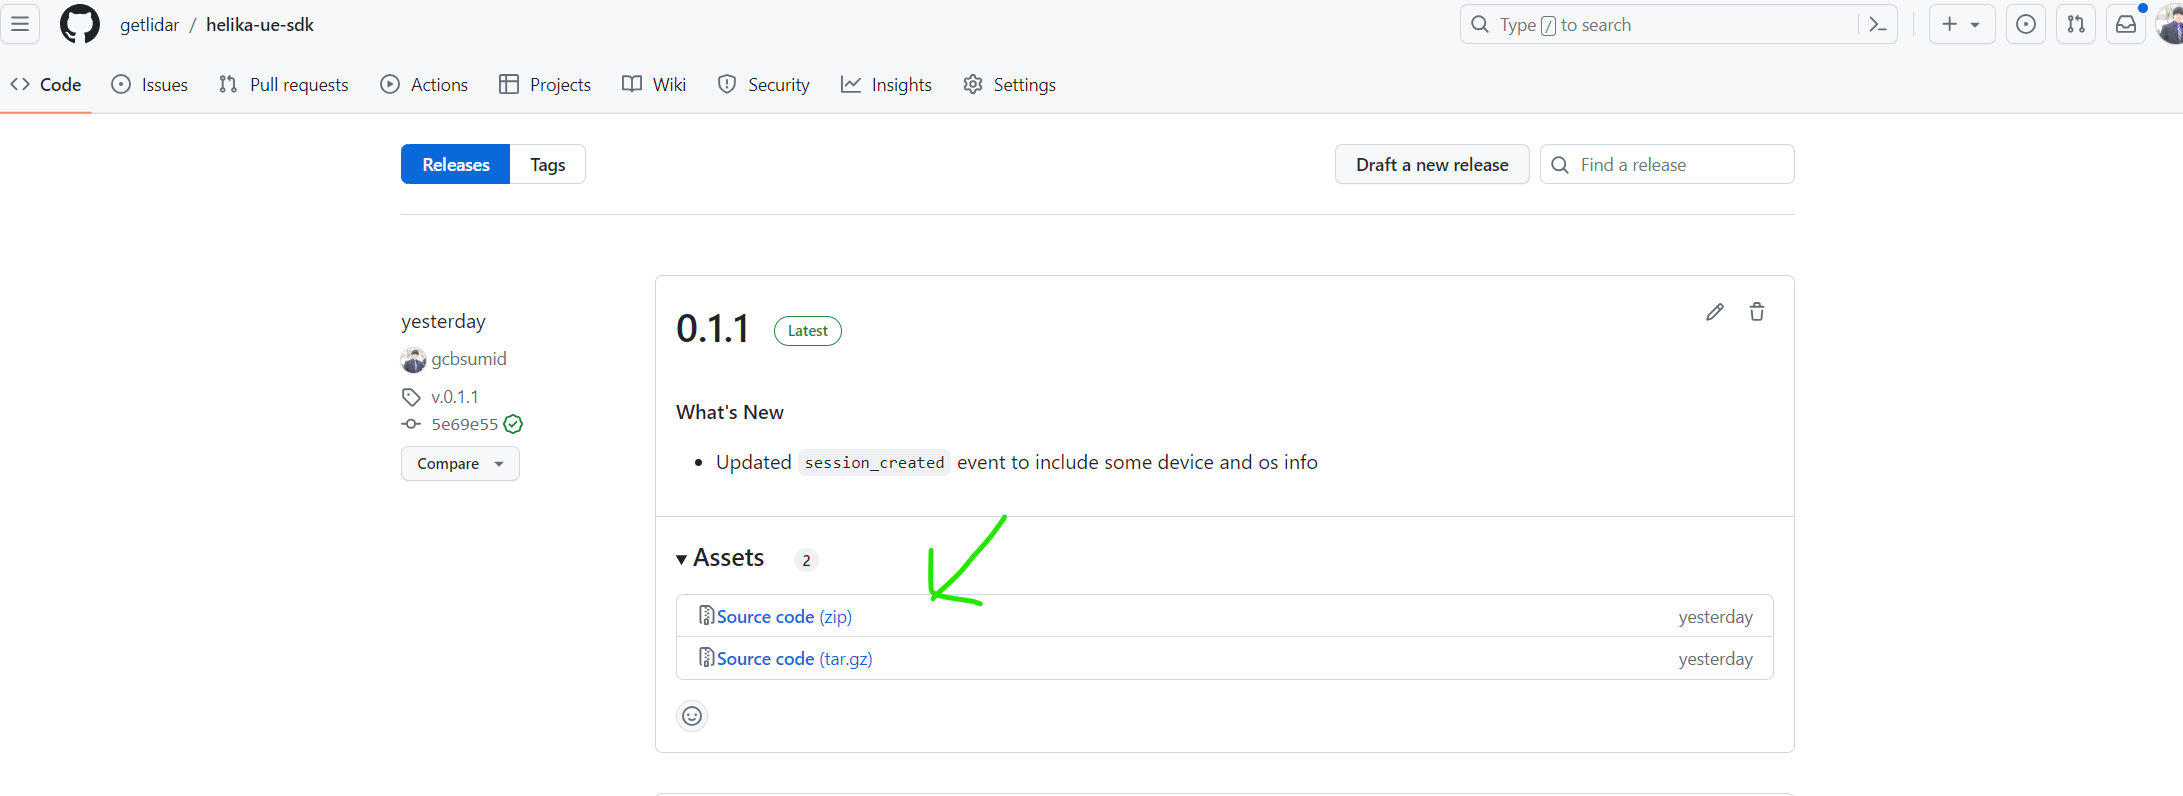
-
Unzip and rename the folder to
Helikafromhelika-ue-sdk-v.X.X.X.
-
-
Step 2: Add the Plugin to Your Project
- Open your Unreal Engine project in the Unreal Editor. An example project can be found here.
- Navigate to the Plugins directory within your project’s folder.
- Copy/Move the
Helikafolder into the Plugins directory of your project.
-
Step 3: Enable the Plugin in Unreal Editor
- Launch the Unreal Editor for your project.
- Go to the Edit menu and select Plugins.
- In the Plugins window, navigate to the Installed section and locate the Helika plugin you installed.
- Enable the plugin by checking the checkbox next to its name.
- Click the Restart Now button to apply the changes and restart the Unreal Editor.
- The plugin is now installed and enabled in your Unreal Engine project.
Sending Events
-
Step 1: Add the BP_HelikaActor blueprint
-
After installing the plugin, Add
BP_HelikaActorto your level From All->Plugins->Helika Content.
-
-
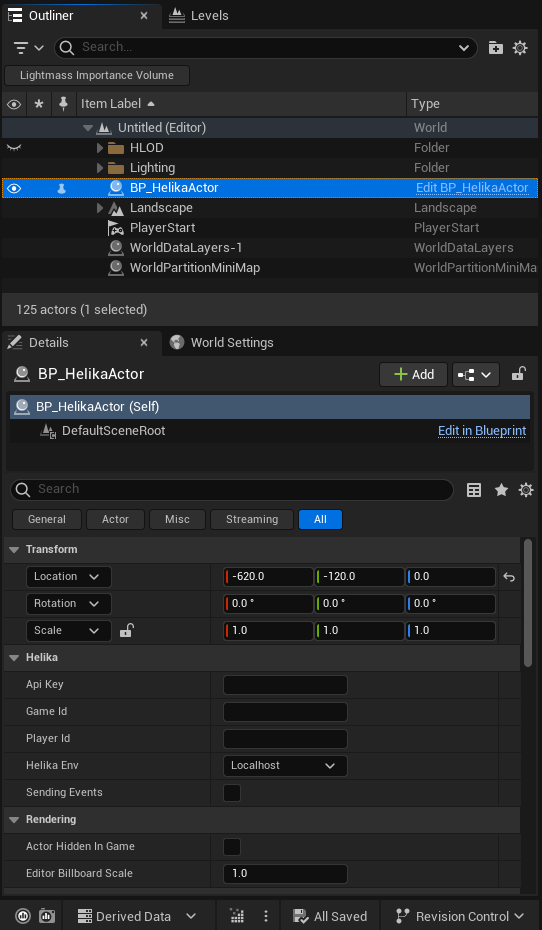
Step 2: In the Details menu, add in the required config values.
-
Now select BP_HelikaActor in your level and add in the required config values.
-
Api Key- Provided by your account rep. Please contact Client Success Manager if you do not yet have an API key for your organization.
-
Game Id- Identifier for the specific game the events should associate to.
- Used to differentiate events between multiple IPs in your portfolio.
-
Player Id- Unique identifier for a given player.
- You can also programmatically set the
Player IDat any time. It is simply appended to all sent events.
- You can also programmatically set the
- Unique identifier for a given player.
-
Helika Env- either
Localhost,Develop, orProduction
- either
-
-
-
Step 3: Get Reference to
BP_HelikaActorand send events- Reference
BP_HelikaActorfrom your Level - Call the
Send EventFunction using the suggested Event Taxonomy format.

- Reference
API Reference
Game Event Taxonomy
Automatic Data Capture
The Helika SDK automatically appends selected data fields in the event along side your customized data event.
| Field | Type | Required/Optional | Description |
|---|---|---|---|
| game_id | string | required | The Game ID that we will use to identify your game's events (if set in the event itself, that overrides the default game_id set on initialization |
| created_at | DateTime | required | The timestamp when the event was created. |
| session_id | u4 | required | The sdk generates a new Session ID when the Helika Object is created. |
| player_id | string | optional | You can set the "player_id" to identify all events generated after will be associated with this specific player. |
Demo Project
A demo project has been created to demonstrate how the Helika UE SDK functions. Please use the following repo as a reference:
Validation
It is recommended that you verify events are being ingested correctly by sending some test events via the SDK. Successfully sent events should have a 200 status response.
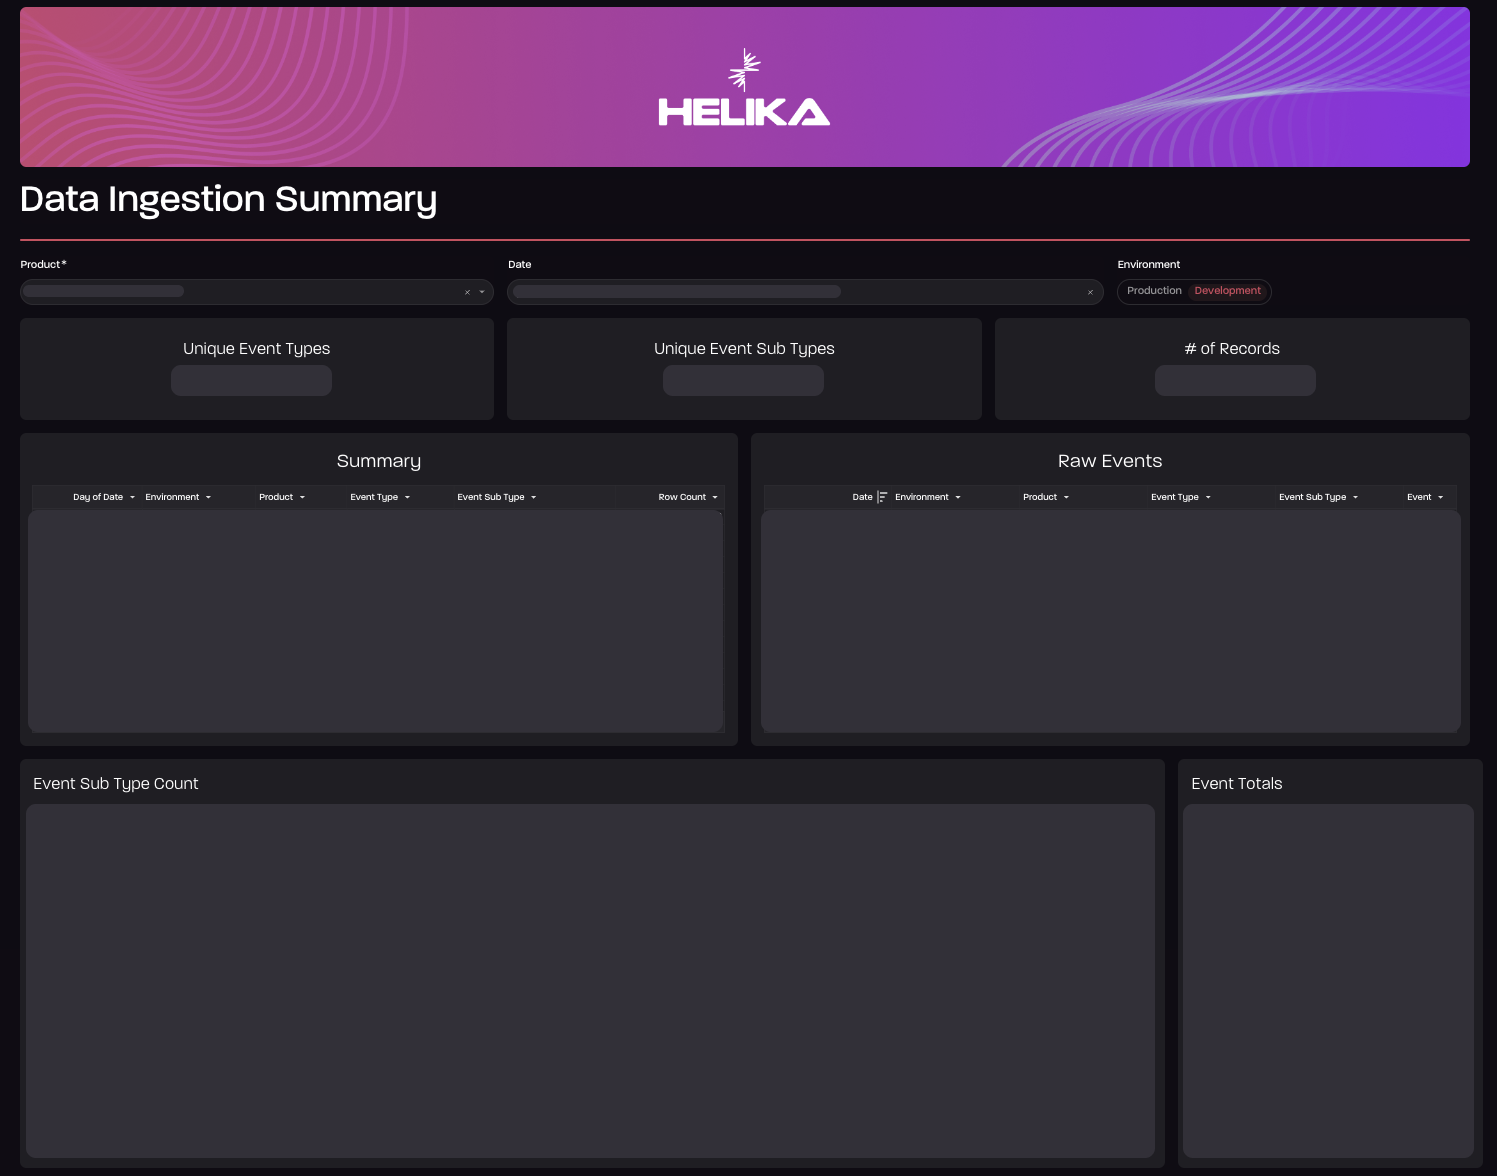
Check within your portal for the events to appear in the Data Ingestion Summary.
The Data Ingestion Summary report can be found in the side menu:
Data Summary > Data Ingestion Summary
The Data Ingestion Summary will display information such as:
- Which environment the events are being sent to
- Total Event Volumes
- Types, and Sub Types Seen
- A table for the raw event stream, with raw payload.
Ingestion Delays
Please expect up to the following delays during event processing, before results are populated:
- Production: 15 minutes
- Development: 2 hours
After seeing some test events appear, this report can be used to monitor your ongoing events and event volumes, as they are added.
Updated 7 months ago